Combat Positioning
The most important thing in the entire game to learn is how to position your character. If you can master this, your consistency will go through the roof. 1 on 1, your character tends to be far stronger than any individual enemy you will face. The difficulty comes when having to face many of them, especially many of them at the same time. Our goal in combat is to position ourselves to only allow a single enemy to attack us at a time and, if possible, fully recover before fighting the next enemy. Let's take a look at some examples:
Corridors
Here, we can find ourselves in an area with some pretty tight corridors. Despite this, we're outnumbered here in this combat. The enemy moves at the same speed as we do, so as long as we're moving away, the combat will be stagnant. We can use that to put ourselves in a better position.
By falling back to a more strategically beneficial location, we now only fight one enemy at a time, making this fight far more manageable since we only have to consider a single enemy's damage. In addition, we are right next to a set of stairs so we can get away to a prior level that we've cleared out.
Be careful of enemies attacking on the diagonal, make sure you position yourself so that only a single enemy can hit you. We always want to run back to where we've explored already instead of forward into the unknown since usually there are just going to be more enemies.
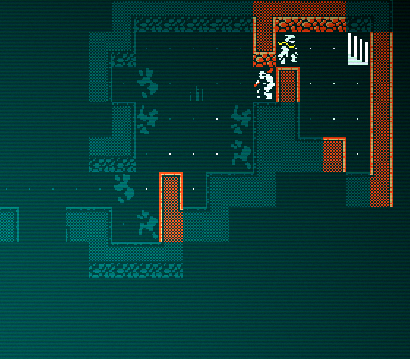
Waiting
Whenever we encounter an enemy who is an odd number of tiles away, we have the opportunity to position ourselves better. In this case, it's far more beneficial to let the enemy come to us instead of walking to the enemy. If we walk towards them, they get to start the combat with their own attack, like this:

As I step into range, the ![]() cannibal gets to immediately attack me. Not only am I now injured, but I've opened up another avenue for attack on the southwest diagonal. Instead, I should have waited, which keeps me safe from additional, unseen enemies, and allows me to start the combat, which reduces the number of attacks I need to endure before killing my opponent.
cannibal gets to immediately attack me. Not only am I now injured, but I've opened up another avenue for attack on the southwest diagonal. Instead, I should have waited, which keeps me safe from additional, unseen enemies, and allows me to start the combat, which reduces the number of attacks I need to endure before killing my opponent.
Ranged Enemies
Normally, the correct thing to do is to wait here and let the enemy come to you. Since their most direct mode of approach leaves them diagonal to myself, this would actually stop any other enemies from being in melee with me since an enemy that can attack you in melee won't move. However, this is a ranged enemy, which requires a different consideration. It can attack me in this position, so it has no need to move any closer, and won't. If I stay where I am, I'll be attacked for free anyways, so instead of staying put I should move closer. Moving in still leaves me in a tactically strong position, since I'll continue to only be attacked by that single ![]() snapjaw, which will be beneficial in case there are more behind it that I don't see.
snapjaw, which will be beneficial in case there are more behind it that I don't see.
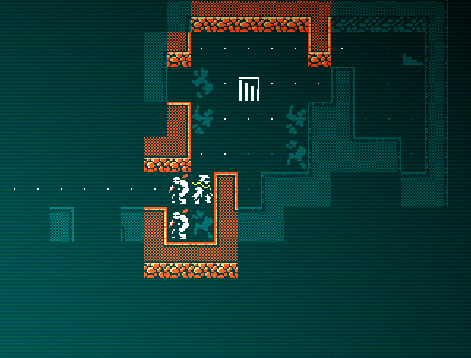
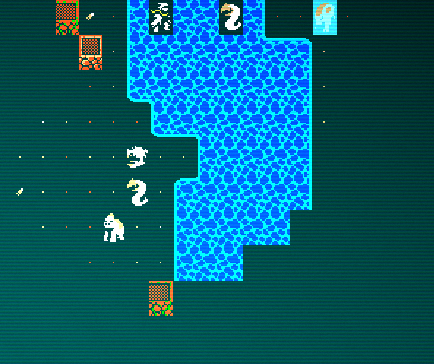
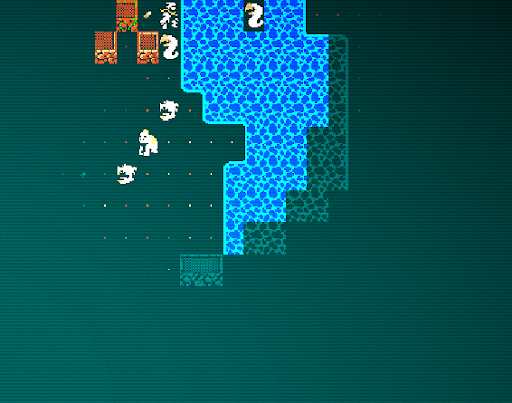
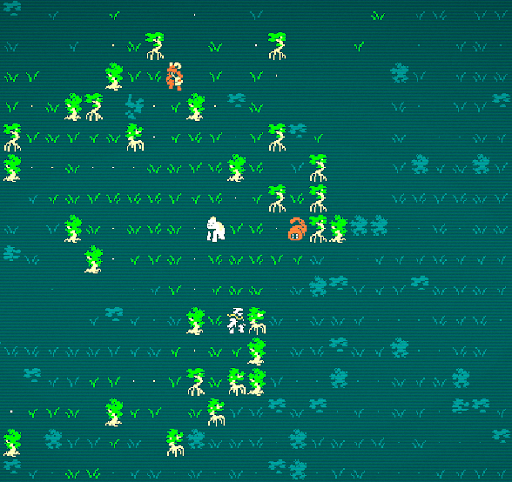
Surrounded
Sometimes, enemies can aggro on you outside your visual range. You may think that a prior area is cleared, but there is a trailing enemy coming after you as you advance. In these kinds of scenarios, you need to consider if you can kill the enemies reliably or if you need to retreat. We can see an avenue of escape to the right, which we may need to ![]() Sprint to grow the gap. If we think we can take the enemies, how can we best position ourselves to give us the best chance of victory?
Sprint to grow the gap. If we think we can take the enemies, how can we best position ourselves to give us the best chance of victory?
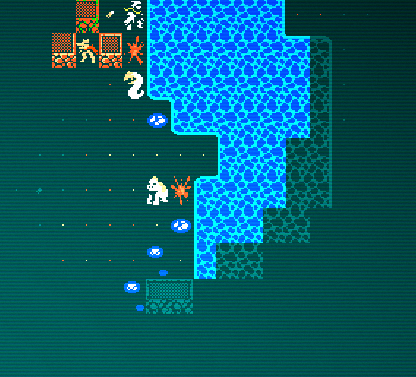
Your first thought may take you to the right, and against melee enemies, this would be an excellent position. The asphalt would protect us from having to fight both at the same time, since they won't try and attack us through it. If we want to be extra careful, we could take a few more steps back to the ![]() trash pile to guarantee only one can be next to us. However, these are ranged enemies.
trash pile to guarantee only one can be next to us. However, these are ranged enemies.
We can move to the northwest here, putting us in melee with the northern ![]() snapjaw. This position gives us cover from the southern
snapjaw. This position gives us cover from the southern ![]() snapjaw, forcing it to approach us in melee to attack. While the southern one approaches, we can kill the northern one and be in a solid position for when the southern one arrives. If the fight goes poorly, we can even escape north, back to the explored territory.
snapjaw, forcing it to approach us in melee to attack. While the southern one approaches, we can kill the northern one and be in a solid position for when the southern one arrives. If the fight goes poorly, we can even escape north, back to the explored territory.
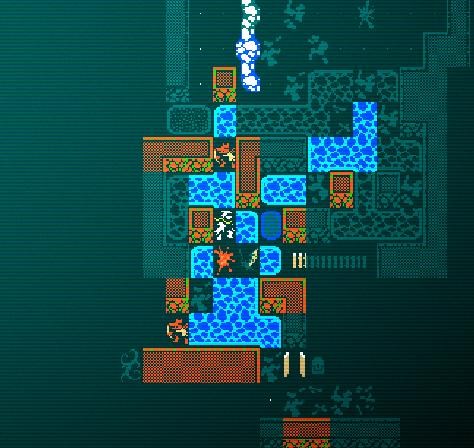
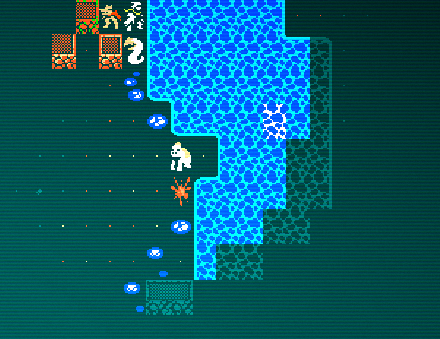
Water and Open Areas
A common sight for those who have braved the waterlogged tunnels beneath Joppa. Enemies will prefer not to enter the water if they can help it, so while this may at first glance look like a position where we will get completely surrounded, there is actually a defensible point next to the northern lead slug.
🗒️ Note: We're at the top of the map here, so we could also go to the prior zone. For the purposes of the example, however, I stay within this zone.
Right after arriving at the position, I can start attacking the ![]() knollworm in melee with me. Since the
knollworm in melee with me. Since the ![]() albino ape is not a fan of the creatures around it, we'll also get some help there. Enemies will file in nicely as long as we can kill them fast enough, and after a few turns of combat our situation is mostly resolved.
albino ape is not a fan of the creatures around it, we'll also get some help there. Enemies will file in nicely as long as we can kill them fast enough, and after a few turns of combat our situation is mostly resolved.
Uh oh, we've got another problem on the horizon…
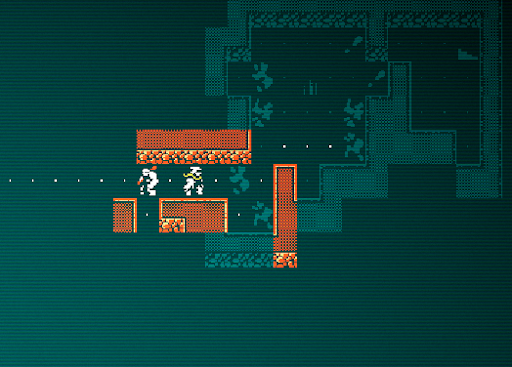
Who Do I Hit?
Sometimes, despite your best play, you find yourself in a scenario where the most optimal thing to do is fight two or more enemies at once. While positioning ourselves better should always be a consideration we make, it's not always possible. There are times when the best we can do is put our back to a wall and do the best with the cards we've been dealt. The choice now becomes what ability to use on what enemy. Most of the time, these will be different enemies, and this is the only time when the choice is at all meaningful, so we'll analyze those situations.
Here, we have a very weak enemy in the ![]() snapjaw and a stronger enemy in the
snapjaw and a stronger enemy in the ![]() knollworm. Your first intuition may be to hit the
knollworm. Your first intuition may be to hit the ![]() knollworm, as it's the larger threat. However, this is (usually) the wrong choice. Unless the other enemy is so pathetic that it cannot possibly endanger you or the main enemy deals many, many times more damage than the smaller one, you should always focus on the more easily killed threats first. While they won't be doing most of the damage, it's still a source of damage coming at you. Consider the turns it will take to kill the main threat; in this case, let's say it's 4. That's 4 turns you need to endure both the
knollworm, as it's the larger threat. However, this is (usually) the wrong choice. Unless the other enemy is so pathetic that it cannot possibly endanger you or the main enemy deals many, many times more damage than the smaller one, you should always focus on the more easily killed threats first. While they won't be doing most of the damage, it's still a source of damage coming at you. Consider the turns it will take to kill the main threat; in this case, let's say it's 4. That's 4 turns you need to endure both the ![]() snapjaw and the
snapjaw and the ![]() knollworm; and while
knollworm; and while ![]() snapjaws are as weak as they come in terms of
snapjaws are as weak as they come in terms of ![]() HP, they can still do non-negligible amounts of damage. Instead, we can instantly kill the
HP, they can still do non-negligible amounts of damage. Instead, we can instantly kill the ![]() snapjaw and only have to deal with the damage of the
snapjaw and only have to deal with the damage of the ![]() knollworm. This is in general a good strategy: kill the enemy that you can kill the fastest first.
knollworm. This is in general a good strategy: kill the enemy that you can kill the fastest first.
Let's return to that (usually) that was dropped in the prior paragraph and consider the scenario where there are multiple enemies attacking us now, but there are more enemies queued up to take a shot at us. We should consider what killing the current enemy beside us will replace it with. Sometimes, you want to intentionally leave a weak enemy scraping at you if it means it prevents a stronger enemy from taking its place.
In these scenarios, also consider abilities you can use to neutralize one of the combatants. Our goal here is not to kill them, just to remove them from the combat temporarily while we kill the other. Abilities like ![]() Menacing Stare,
Menacing Stare, ![]() Intimidate, stasis/freeze/stun/sleep grenades,
Intimidate, stasis/freeze/stun/sleep grenades, ![]() Conk on a stunned target,
Conk on a stunned target, ![]() Force Bubble,
Force Bubble, ![]() Force Wall,
Force Wall, ![]() Sleep Gas Generation, and effects like these mentioned all give us a temporary equalization of the battlefield, which lets us take less damage killing one enemy while the others recover.
Sleep Gas Generation, and effects like these mentioned all give us a temporary equalization of the battlefield, which lets us take less damage killing one enemy while the others recover.
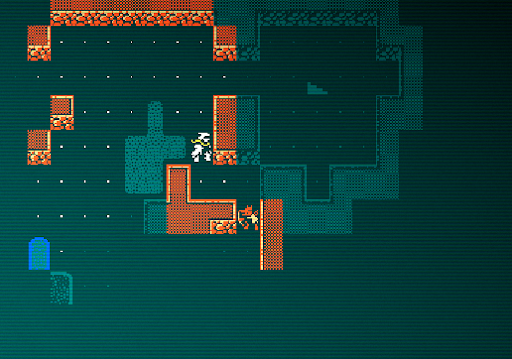
Trees and Line of Sight
A common sight in the Jungle; a ![]() goatfolk sower and open ground between you and it. Approaching it would lead to many explosions to the face and likely death. It's not clear in the Jungle which trees are and are not solid, but in these scenarios, it doesn't really matter. What matters is that they can't see you through any tree, so we can position ourselves with a tree between us and the thing we don't want to have see us. If it's solid, then they will path around it. If it's not, then they'll either approach or at least have a higher likelihood of hitting the tree instead of us.
goatfolk sower and open ground between you and it. Approaching it would lead to many explosions to the face and likely death. It's not clear in the Jungle which trees are and are not solid, but in these scenarios, it doesn't really matter. What matters is that they can't see you through any tree, so we can position ourselves with a tree between us and the thing we don't want to have see us. If it's solid, then they will path around it. If it's not, then they'll either approach or at least have a higher likelihood of hitting the tree instead of us.
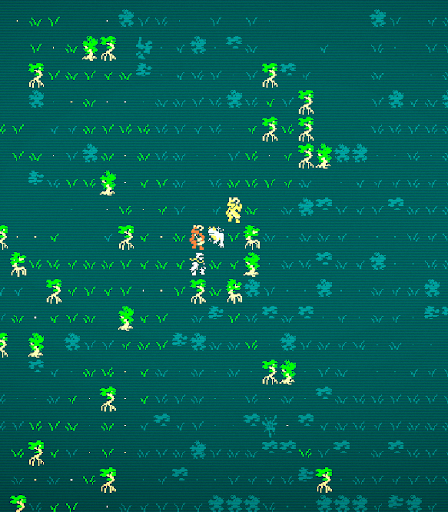
I've moved behind the tree to the left, and while it had the desired effect of getting the ![]() goatfolk sower in melee range, there were more enemies that I couldn't see that also came. In this scenario, the
goatfolk sower in melee range, there were more enemies that I couldn't see that also came. In this scenario, the ![]() goatfolk bully can do a few different things, and which it chooses is more or less random. Through experience, I can say that typically, it won't move since it wants to move to the tile that the
goatfolk bully can do a few different things, and which it chooses is more or less random. Through experience, I can say that typically, it won't move since it wants to move to the tile that the ![]() ice frog is on. With that knowledge and the knowledge that we can endure the
ice frog is on. With that knowledge and the knowledge that we can endure the ![]() ice frog for however long we need, we can kill the
ice frog for however long we need, we can kill the ![]() goatfolk sower here leaving us with just the
goatfolk sower here leaving us with just the ![]() ice frog to kill on its own and then the bully after.
ice frog to kill on its own and then the bully after.
There's another reason why killing the sower is the better solution, however. Even if everything goes wrong and the bully makes it in melee with us, we'd still want to have the sower dead as fast as possible. In fact, in the worst-case scenario, we would especially want the sower dead. This is because the sower jeopardizes our escape route. With the explosives it hurls out, any attempt to disengage with the sower still alive will result in us getting blown up. Killing it first ensures that in the event we do need to escape, we won't get splattered.