Practical Application
We've learned a lot of information, it's about time we put that information into practice and learn a few more things about the world of Qud as we do. For this section, I will be playing as and assuming you will be playing as the Marsh Taur preset. Let's tackle the first quest in the game, "What's Eating the Watervine?".
Receiving the Quest
Perhaps you've figured out how to start this quest already from a prior run that you've done, but humor me and keep reading. We're going to start out in Joppa handling the zone in the same way you should handle most zones. First, we're going to autoexplore by pressing the [Numpad 0] key (by default). If you've set up your automation settings like I've suggested, this will take you through everything interesting on the map and you will be stopped when anything hostile starts to threaten you so you don't have to worry about being attacked before you can react. Once the autoexplore ends, press the [backspace] key. This will bring up a menu of all of the points of interest on the map.
This is the habit you get into when exploring new zones; especially if you think there might be something important in the zone. Autoexplore, then [backspace] and move from there!
For Joppa, this will primarily be the main interesting NPCs; we're interested in speaking with ![]() Mehmet, so select
Mehmet, so select ![]() Mehmet on the menu and you will automatically walk to him. Press the [spacebar] key to interact and you'll start up a conversation with
Mehmet on the menu and you will automatically walk to him. Press the [spacebar] key to interact and you'll start up a conversation with ![]() Mehmet. We're interested in getting a job from him, so move through that dialogue to get the quest. Once you have the quest, you can press [q] to open up your [q]uest log and view what you need to do in order to complete the quest.
Mehmet. We're interested in getting a job from him, so move through that dialogue to get the quest. Once you have the quest, you can press [q] to open up your [q]uest log and view what you need to do in order to complete the quest.
Water Ritual
One thing you will notice as an option when you first talk to ![]() Mehmet is the option to perform the water ritual with him for 1 dram of fresh water. Particularly important creatures will have this option and doing the water ritual with them is the ultimate bond. It is globally frowned upon to kill a creature you have bonded with through the water ritual, so don't do that. Performing the water ritual will make factions that like the creature like you by proxy and factions that hate the creature hate you by proxy as well, so it's worth using [l]ook to check the factions that have opinions of the creature you are about to water ritual.
Mehmet is the option to perform the water ritual with him for 1 dram of fresh water. Particularly important creatures will have this option and doing the water ritual with them is the ultimate bond. It is globally frowned upon to kill a creature you have bonded with through the water ritual, so don't do that. Performing the water ritual will make factions that like the creature like you by proxy and factions that hate the creature hate you by proxy as well, so it's worth using [l]ook to check the factions that have opinions of the creature you are about to water ritual.
The concept of factions and reputation is a huge topic, and massively complex. I have an article on the topic, but for now it's probably more in depth than is necessary. We'll be ignoring the water ritual for right now, but don't worry too much at the start about angering factions and just do the water ritual (or don't) when you feel like it.
Going to Red Rock
At level 1 and especially as new players, tackling the Red Rock dungeon would be very dangerous and probably result in your death. We are still going to head in that direction, but we won't be entering it right away. First, go to the zone north of Joppa by walking to the edge of the screen and transitioning. Autoexplore that zone, and there will be a statue that tells you about a historic site. This is always here, and while we won't be covering its exploration you should try giving it a go once you finish up with this quest. Now, let's get to the dungeon.
Press [-] to move to the world map, and move 1 parasang north of Joppa to the parasang pictured. We're 1 parasang south of Red Rock at this point, and you might be curious why we're not moving directly on to that parasang and entering from there. The reason is that there are often packs of bloodthirsty ![]() baboons around Red Rock and if we entered from the world map, we would be in the center zone. This means we could potentially be surrounded on all sides by
baboons around Red Rock and if we entered from the world map, we would be in the center zone. This means we could potentially be surrounded on all sides by ![]() baboons! In order to make sure we have somewhere to retreat to, we're going to approach from the parasang south of Red Rock.
baboons! In order to make sure we have somewhere to retreat to, we're going to approach from the parasang south of Red Rock.
Enter the parasang pictured, and move to the zone to the north. This zone should still look similar to the last one. Autoexplore this zone and make sure there aren't any enemies here; kill them if there are. If there is anything in this zone besides ![]() crocs,
crocs, ![]() glowfish or
glowfish or ![]() glowpads, be very very careful as that's a rare occurrence. Once this zone is clear, move to the zone to the north. This will bring us to the Red Rock parasang, completing a quest step and earning you some EXP.
glowpads, be very very careful as that's a rare occurrence. Once this zone is clear, move to the zone to the north. This will bring us to the Red Rock parasang, completing a quest step and earning you some EXP.
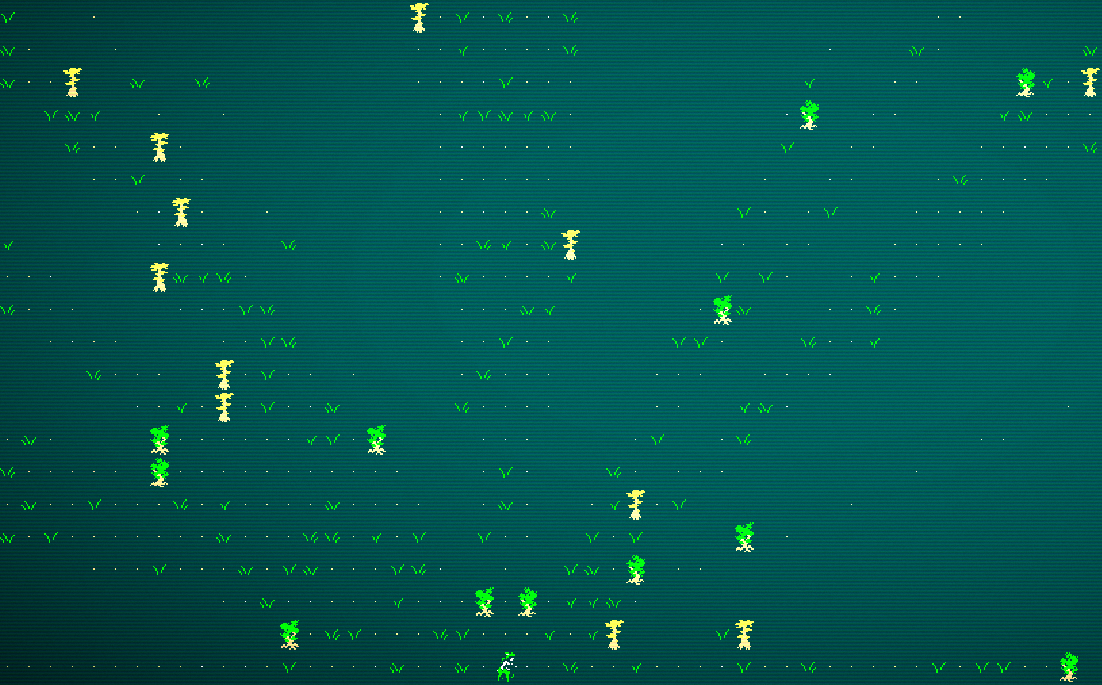
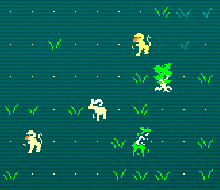
Once there, your map should look something similar to this. It's totally normal for there to not be any ![]() baboons, but these
baboons, but these ![]() baboons are what we are here for. There are many different ways for you to level up at the very start of the game; some people say to kill
baboons are what we are here for. There are many different ways for you to level up at the very start of the game; some people say to kill ![]() glowfish as they hardly fight back, some people say to explore the salt dunes to the west, some say to go to the Six-Day Stilt to complete a quest for EXP. However,
glowfish as they hardly fight back, some people say to explore the salt dunes to the west, some say to go to the Six-Day Stilt to complete a quest for EXP. However, ![]() baboons are an excellent source of EXP and are not very dangerous once you know how to deal with them and we can learn some good techniques by taking them on.
baboons are an excellent source of EXP and are not very dangerous once you know how to deal with them and we can learn some good techniques by taking them on.
The ![]() baboons have a very simple strategy: they will throw rocks at you and move away from you constantly so that while you try and close the gap, they're getting free damage on you. The way to beat the
baboons have a very simple strategy: they will throw rocks at you and move away from you constantly so that while you try and close the gap, they're getting free damage on you. The way to beat the ![]() baboons is to not let them play their game, and we can do this in 2 ways depending on how many
baboons is to not let them play their game, and we can do this in 2 ways depending on how many ![]() baboons are attacking us.
baboons are attacking us.
Option 1: Few ![]() baboons (1-2)
baboons (1-2)
If there are very few ![]() baboons attacking us at once, we simply stand there and let them toss their rocks at us. Here's the reasoning:
baboons attacking us at once, we simply stand there and let them toss their rocks at us. Here's the reasoning:
- A
 baboon will stand at the edge of their throw range to throw rocks. If you do not approach, they won't either and at this max range they will be less accurate.
 - If we approach, they will run away. This will drag us into other baboons and now we will have multiple attacking us at once (bad).
- A baboon only has a few
 stones to throw. Once they are out, they will approach.
Once the ![]() baboon is out of
baboon is out of ![]() stones, they will try to attack in melee. This is where our character can simply kill them. While we're waiting, since we have a ranged attack we can use that; our
stones, they will try to attack in melee. This is where our character can simply kill them. While we're waiting, since we have a ranged attack we can use that; our ![]() Freezing Ray. This is actually quite likely to kill them outright, but if they survive they will be easily handled with our melee attack.
Freezing Ray. This is actually quite likely to kill them outright, but if they survive they will be easily handled with our melee attack.
Option 2: Many ![]() baboons (3+)
baboons (3+)
If there are a lot of ![]() baboons attacking us at once, instead of letting them throw rocks at us and then all attack at the same time, we should instead drag them to us in a more favorable fight. Consider the following scenario:
baboons attacking us at once, instead of letting them throw rocks at us and then all attack at the same time, we should instead drag them to us in a more favorable fight. Consider the following scenario:
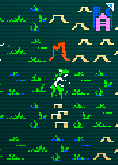
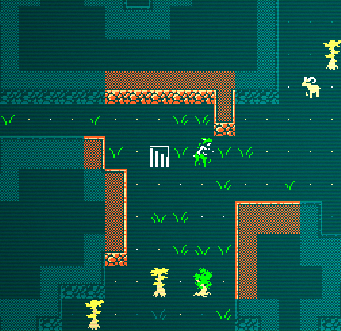
We are on the edge of the map (as you should be, it's one of the safest places to be on the overworld) and we have 3 dangerous looking ![]() baboons closing in (and more on the horizon not pictured). They will throw many rocks and then melee us with numbers if we do nothing, so instead we're going to move back to the prior zone and take 1 step away from the edge. At the risk of information overload, Caves of Qud will continue to simulate a zone that you've just come from (to a certain extent). This means that the
baboons closing in (and more on the horizon not pictured). They will throw many rocks and then melee us with numbers if we do nothing, so instead we're going to move back to the prior zone and take 1 step away from the edge. At the risk of information overload, Caves of Qud will continue to simulate a zone that you've just come from (to a certain extent). This means that the ![]() baboons will follow us across the zone transition, but they won't actually be able to throw their
baboons will follow us across the zone transition, but they won't actually be able to throw their ![]() stones until they are on the same screen as us. You CAN be melee attacked from something that is not on screen, but you cannot be ranged attacked by something not on screen. This is why we are going to back up a tile, like so:
stones until they are on the same screen as us. You CAN be melee attacked from something that is not on screen, but you cannot be ranged attacked by something not on screen. This is why we are going to back up a tile, like so:
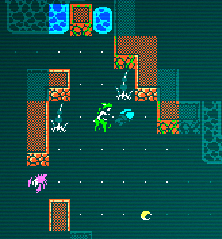
In this gif, I'm waiting ([Numpad 5]) until the ![]() baboon goes through the zone transition and gets right next to me. Then, I can simply attack it like I would anything else, but I don't have to worry about it running away or getting help from its friends because they're still in the other zone. This strategy is incredibly powerful; clear out a zone, and then draw enemies from another zone into the cleared out zone. There is one notable weakness to this strategy, and that is that creatures with followers will bring all of their followers with them when they transition zones, so be careful!
baboon goes through the zone transition and gets right next to me. Then, I can simply attack it like I would anything else, but I don't have to worry about it running away or getting help from its friends because they're still in the other zone. This strategy is incredibly powerful; clear out a zone, and then draw enemies from another zone into the cleared out zone. There is one notable weakness to this strategy, and that is that creatures with followers will bring all of their followers with them when they transition zones, so be careful!
While you're fighting, keep a close eye on your ![]() HP. Take note of how much damage your opponent is doing (hint: the chat log always has the precise amounts) and make sure not to let your
HP. Take note of how much damage your opponent is doing (hint: the chat log always has the precise amounts) and make sure not to let your ![]() HP fall too close to that number, try to leave a 2-3 hit threshold. Flee and regen your
HP fall too close to that number, try to leave a 2-3 hit threshold. Flee and regen your ![]() HP if you have to, or if things get really dicey use your healing items. As Marsh Taur, our only healing item will be witchwood bark which has a chance to confuse us which will jumble our screen. It only jumbles things visually though, so make sure to take a note of what tile your opponent is in before you eat it and continue to attack that tile if you get confused. A superior healing item is the
HP if you have to, or if things get really dicey use your healing items. As Marsh Taur, our only healing item will be witchwood bark which has a chance to confuse us which will jumble our screen. It only jumbles things visually though, so make sure to take a note of what tile your opponent is in before you eat it and continue to attack that tile if you get confused. A superior healing item is the ![]() salve injector which we'll get at the end of this quest, which doesn't have the confusion side-effect.
salve injector which we'll get at the end of this quest, which doesn't have the confusion side-effect.
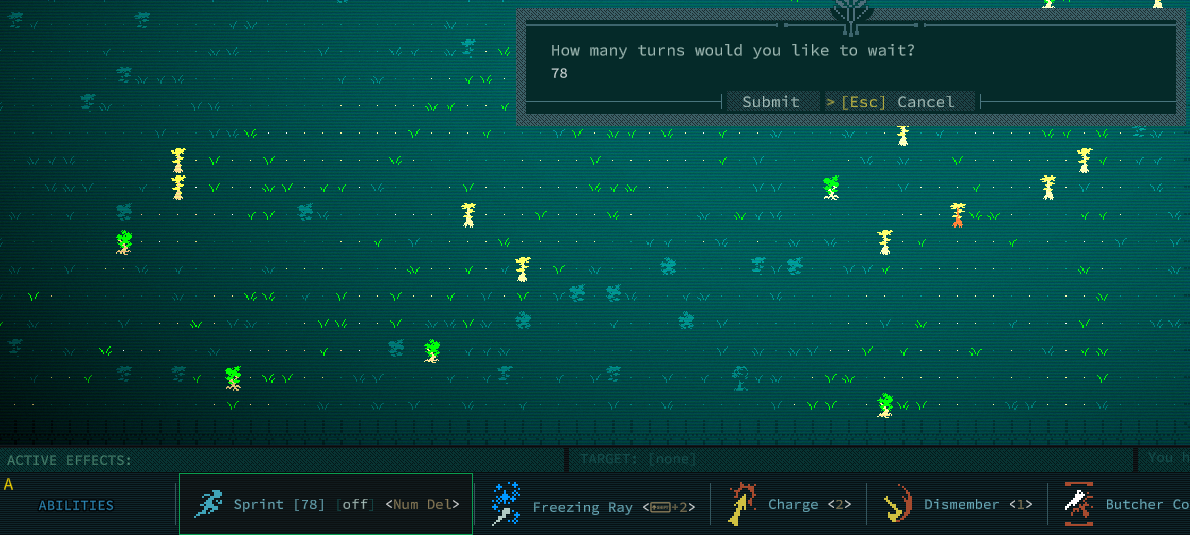
Once you've defeated your ![]() baboon opponent, you will likely have sustained some injury and might have an ability on cooldown. First, heal up to full hitpoints by using the [`] key. This will pass turns until you're at full health again. Next, use [shift + w] to bring up the wait menu in case you have an ability on cooldown. It will prompt you for the amount of turns you want to wait, defaulting to 10 and remembering what you last set it to if you manually change it. If you have an ability on cooldown, it will automatically raise the counter to the amount of turns it would take for that ability to come off cooldown. For example, in this screenshot the
baboon opponent, you will likely have sustained some injury and might have an ability on cooldown. First, heal up to full hitpoints by using the [`] key. This will pass turns until you're at full health again. Next, use [shift + w] to bring up the wait menu in case you have an ability on cooldown. It will prompt you for the amount of turns you want to wait, defaulting to 10 and remembering what you last set it to if you manually change it. If you have an ability on cooldown, it will automatically raise the counter to the amount of turns it would take for that ability to come off cooldown. For example, in this screenshot the ![]() Sprint ability is on a 78 turn cooldown, so my wait menu will automatically set itself to wait 78 turns.
Sprint ability is on a 78 turn cooldown, so my wait menu will automatically set itself to wait 78 turns.
This is the habit you should get into when you finish with combat. It ensures that you always go into your next combat at full strength. Repeat this as much as it takes to clear out a zone of ![]() baboons and you will quickly level up as you do so. While you're leveling up, try and keep
baboons and you will quickly level up as you do so. While you're leveling up, try and keep ![]() Freezing Ray and
Freezing Ray and ![]() Multiple Legs at about even ranks, only putting points into
Multiple Legs at about even ranks, only putting points into ![]() Teleportation if you can't rank up the other two. At level 5 you get a rapid mutation, which increases a physical mutation's rank by 3 without spending any points to do so. This means that a rapidly advanced physical mutation can be higher than rank 10, the cap for points you can put into a mutation. Don't worry about this too much for right now, instead generally rapidly advance your most used or most powerful mutation. In our case, if you want my recommendation I would recommend putting the rapid advancement into
Teleportation if you can't rank up the other two. At level 5 you get a rapid mutation, which increases a physical mutation's rank by 3 without spending any points to do so. This means that a rapidly advanced physical mutation can be higher than rank 10, the cap for points you can put into a mutation. Don't worry about this too much for right now, instead generally rapidly advance your most used or most powerful mutation. In our case, if you want my recommendation I would recommend putting the rapid advancement into ![]() Multiple Legs.
Multiple Legs.
Hulking Baboons
Eventually, you are very likely to run into one of these yellow-colored ![]() baboons. These are
baboons. These are ![]() hulking baboons, and they are much stronger than the normal tan ones we've been running through. They have a single
hulking baboons, and they are much stronger than the normal tan ones we've been running through. They have a single ![]() boulder they can throw for big damage (as well as the normal rocks), and they have higher Strength than other
boulder they can throw for big damage (as well as the normal rocks), and they have higher Strength than other ![]() baboons meaning they can do a lot more damage. My advice is to not try and fight one of these until you're at least level 4. You're going to want to fight this guy differently than you do the rest, and you always want to fight it 1-1 without any of its buddies helping it out. First, you want to try and stay out of melee and just use your
baboons meaning they can do a lot more damage. My advice is to not try and fight one of these until you're at least level 4. You're going to want to fight this guy differently than you do the rest, and you always want to fight it 1-1 without any of its buddies helping it out. First, you want to try and stay out of melee and just use your ![]() Freezing Ray to chip it down. This is easier to do with the Marsh Taur because it has enhanced move speed due to
Freezing Ray to chip it down. This is easier to do with the Marsh Taur because it has enhanced move speed due to ![]() Multiple Legs. If it does get within melee with you, use your
Multiple Legs. If it does get within melee with you, use your ![]() Dismember skill and then continue to try and back away. Don't forget to use
Dismember skill and then continue to try and back away. Don't forget to use ![]() Teleportation if it brings you under 50%
Teleportation if it brings you under 50% ![]() HP.
HP.
My biggest advice throughout this process (and in general!) is don't be afraid of using your cooldowns, but when you use your escape cooldowns make sure you get to a place where you can get them back! There's no penalty for playing slow; you'll have plenty of water and eating is free. Run away often if you need to, make sure you engage fights at full strength.
Into the Dungeon
Once you've cleared out the 8 zones around the center, go to the center zone and clear it out and autoexplore. This zone will look a little different than the rest, and will have a set of stairs leading down. Press [+] to navigate to the stairs once you've found them and climb into the dungeon proper. I'll be expecting you to be level 5-7 from the ![]() baboons from here on in!
baboons from here on in!
Underground, there's no light from the sun so you can only see as far as your light source can extend. For us, that's our ![]() torch. If ever the light goes out, don't panic: open up your [e]quipment and equip a
torch. If ever the light goes out, don't panic: open up your [e]quipment and equip a ![]() torch in one of your hands. We'll be handling the dungeon floors like we handle any other zone: with autoexplore! We'll run into various critters down here, some hostile and some not. Be sure to use [alt] to learn which is which. Make sure you don't forget to use
torch in one of your hands. We'll be handling the dungeon floors like we handle any other zone: with autoexplore! We'll run into various critters down here, some hostile and some not. Be sure to use [alt] to learn which is which. Make sure you don't forget to use ![]() Freezing Ray and buy combat skills (
Freezing Ray and buy combat skills ( ![]() Freezing Ray is especially helpful for the
Freezing Ray is especially helpful for the ![]() giant centipedes, who are very dodgy). Pick up dropped equipment from
giant centipedes, who are very dodgy). Pick up dropped equipment from ![]() snapjaws and try and find some upgrades, but make sure that
snapjaws and try and find some upgrades, but make sure that ![]() torch stays equipped. For weapons, favor any
torch stays equipped. For weapons, favor any ![]() Axe you find as our character already has skills for
Axe you find as our character already has skills for ![]() Axes. As for armor, try and pick the armor with the highest
Axes. As for armor, try and pick the armor with the highest ![]() AV. Make sure to pick up any artifacts you find and try to identify them through e[x]amination. Keep them even if you break them, as you can pay tinkers to repair them!
AV. Make sure to pick up any artifacts you find and try to identify them through e[x]amination. Keep them even if you break them, as you can pay tinkers to repair them!
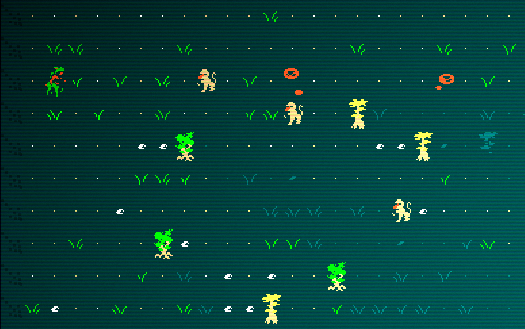
Once you're on strata 4, you can find the target of our quest: a girshling! This pink crawly just needs to be killed for our quest to be complete. We need the body somewhat intact, so don't burn it (not a problem for us). This girshling is a bit weaker than the ![]() hulking baboons we talked about earlier, so make sure you give it a good
hulking baboons we talked about earlier, so make sure you give it a good ![]() Freezing Ray hit and a
Freezing Ray hit and a ![]() Dismember and it shouldn't be long for this world. Once it's dead, pick up its corpse and make your way out of the dungeon (or skip to the next section if you're up for a challenge). Remember, you can quickly navigate to the stairs up by pressing [-]. Once we're on the overworld, press [-] again to go to the world map and return to Joppa. Once we're back cozy and safe in Joppa, press [backspace] and find Elder
Dismember and it shouldn't be long for this world. Once it's dead, pick up its corpse and make your way out of the dungeon (or skip to the next section if you're up for a challenge). Remember, you can quickly navigate to the stairs up by pressing [-]. Once we're on the overworld, press [-] again to go to the world map and return to Joppa. Once we're back cozy and safe in Joppa, press [backspace] and find Elder ![]() Irudad. Talk to him to show him the
Irudad. Talk to him to show him the ![]() girshling corpse and he'll give you some valuable meds as a reward! Congratulations, you've just completed your first quest in Qud!
girshling corpse and he'll give you some valuable meds as a reward! Congratulations, you've just completed your first quest in Qud!
You can turn in artifacts you found to ![]() Argyve for another quest, but before you do make sure to see how much they sell for at
Argyve for another quest, but before you do make sure to see how much they sell for at ![]() Tam and only give
Tam and only give ![]() Argyve the cheap ones. You can also sell the
Argyve the cheap ones. You can also sell the ![]() girshling corpse now, you don't need it anymore.
girshling corpse now, you don't need it anymore.
The Waterlogged Tunnels
If you're up for a bit of a challenge when you kill the girshling, instead of returning to Joppa via the path we already took, why not see where this tunnel leads to find out how these critters have been getting into the village to eat the watervine? At the south of this zone, instead of rock there will be an underground river that leads out of this zone and into another. Keep following this river until its end, then climb the stairs at the end of the river to the surface. The way back is fraught with dangerous creatures, ones I've not covered here (and won't). It's not without its rewards though, so take the plunge if this quest was too easy for you and you want to test yourself.